


Prices of 3D printers have recently become more and more affordable for ordinary users and more good budget models can be found on the market. Unfortunately, they often have their disadvantages. One of them may be the volume level of such a printer during work. In this tutorial I will show you how to minimize the sounds from Anycubic i3 Mega printer to at least bearable level.
To make all the modifications I have made, we will need:
Shopping:
1x Noctua Fan NF-A4x10 FLX – 40mm (https://www.morele.net/noctua-wentylator-nf-a4x10-flx-40mm-552933/)
2x Noiseblocker BlackSilent Fan XS1 (https://www.morele.net/noiseblocker-blacksilent-fan-xs1-itr-xs-1-552945/)
1x Noctua NF-A9x14 (https://www.komputronik.pl/product/174659/noctua-nf-a9x14.html)
5x TCM2208 (https://www.watterott.com/de/SilentStepStick-TMC2208-3D-Drucker-Bundle-5-Stk)
Prints:
Cover for PSU (https://www.thingiverse.com/thing:3152567)
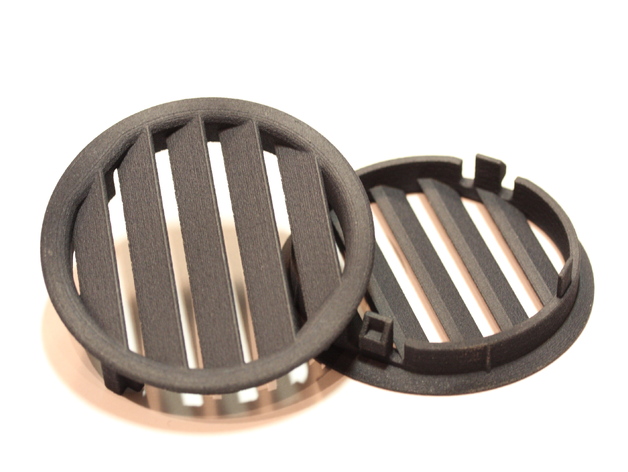
Grapple for fans to cool drivers (https://www.thingiverse.com/thing:2814499)
Modified extruder casing (https://www.thingiverse.com/thing:3073022)
The sounds coming from the printer come mainly from three sources – fans, motors and bearings. In this tutorial I will deal with the first two sound sources, but I will not reducenoise from the bearings.
FANS:
Let’s start with the fans. There are four fans in the printer:
Two of them are in the extrauder casing and are used to cool it. One is for cooling the printer drivers. The last fourth cools the power supply.
The fans built into the printer are relatively cheap and not big, which generates a lot of noise. To make them less noisy it is necessary to exchange them for silent counterparts. There are many solutions on the market, but to be both quiet and efficient, it is worth investing in brand products like Noctua or Noiseblocker, at least I used them.
There are two fans in the extruder housing. On the right, there is a fan measuring 40x40x10. We can take it out and put in its place Noctua NF-A4x10 FLX. If we have identical connectors, we can solder them to our fan. If we do not have such, we have to cut the connector from the original fan and solder it to ours. The second fan is, unfortunately, a turbine fan and it is difficult to find its quiet replacement. Theoretically, it is possible to replace it with a second Noctua NF-A4x10 FLX fan. It could give us the right effect. Nevertheless, I decided to leave it but I replaced the original extruder casing. The original casing has a lot of holes that creates a lot of noise when the air flows throug it. That’s why I printed the enclosure from this link https://www.thingiverse.com/thing:3073022 and mounted it instead of the original one. It has two large holes at the outlet of the fans so that they are quieter and improve cooling.
Part showing how to unscrew extruder shows very vell this movie:
We print this element before:

And we assemble the whole. Printout is very fit so do not be afraid to use force.

Another fan is a fan for cooling the drivers. It is located on the right side under the cover of our printer:

I replaced it for 2 Noiseblocker BlackSilent Fan XS1 fans. They are silent and in the next step we will replace drivers for more heat generating components that’s why we will need better cooling than it was with the original printer.
To be able to mount both fans we will need this small print:
https://www.thingiverse.com/thing:2814499

In order for both fans to be able to work, we connect them in parallel to the cables from the previous fan. If we have the right connectors, it’s good, I soldered everything directly.

The last fan is a fan located in the power supply. To get to him I recommend this movie:
In order to mount the last of our Noctua NF-A9x14 fans in it, we will need this print:
https://www.thingiverse.com/thing:3152567


It replaces the ordinary metal cover of the power supply. We install the fan between the printed teeth and screw it with the m3 screw. The fan is connected to the electronic board of the power supply and should turn on when the temperature of the power supply exceeds a certain value. Personally, however, I pulled the fan cables out and connected them to the previous two cooling fans. This slightly increases the volume of the printer, but the fan is relatively quiet and now it is cooling the power supply constantly. This Noctua fan has unusual colors of cables where the yellow color is power and black is ground.

Here a warning if you want to mount the fan to the power supply you will need to cut the hole in the bottom cover of the printer because it does not fit completely.
That is why it is good to print also such printer supports so that it is a little higher and has better source of air.

If we realy do not want to cut our cover, we can use this project https://www.thingiverse.com/thing:3306465 Theoretically it fits then in the printer. Nevertheless, at least as I tested it myself, the fan in this option presses the power supply even by bending the printed circuit board of the power supply. So in the end I decided to cut the hole in the printer’s cover.
Replacing the fans should already significantly reduce the level of decibels coming out of our machine. The next part is silencing the motors.
MOTORS:

The second large sound generator during printing are motors. The operation of these motors are controlled by the drivers. Unfortunately, the drivers installed in the printer are not among the most expensive and the best. These are A4988 drivers with a maximum resolution of 1/16 step and are simply loud. That’s why we can replace them with TMC 2208.
TMC 2208 have a higher maximum resolution: 1/128 step and a special silentstepstick mode. Which significantly eliminates noises coming from motors.


There are 5 drivers in the printer. They are signed controller X, Y which controls the motors in these axes. The Z controller controls the right Z axis motor. E0 controls the extruder. E1 controls the left Z-axis motor. Drivers are located behind the cooling fan for these components:

We take them out gently. If our drivers are not on the sockets and are directly soldered to the motherboard, unfortunately their replacement is extremely hard and requires replacing the motherboard and additional activities.
In their place, we install our TCM 2208 drivers. Note the markings on the board and on drivers. They must match otherwise our printer may be damaged.

Personally, I recommend buying a set from the original manufacturer Watterott https://www.watterott.com/de/SilentStepStick-TMC2208-3D-Drucker-Bundle-5-Stk However, they are quite expensive and on eBay we can find their cheaper alternatives, I did not buy however, from this source, so it is difficult for me to say what quality they are.
The drivers in the link I’ve provided are already ready for mounting. Earlier I did not notice this offer and I had to solder all the feets myself and stick to each of them a radiator.
After installing our drivers, we still have to rotate cables that are under these drivers. Unfortunately, just turning the cables is not enough because they will not enter the socket and we have to turn the socket. It sticks firmly, which is why in my opinion it is best to take small pincers and slowly pull out the nest by grabbing alternately left and then right side.

The last thing related to drivers is to set its voltage, we do it using a multimeter. We turn on the printer and and we connect one multimeter probe with groundand second probe with reference pin. For me, the values of all the drivers at which print came out well were in the range of 1.2v -1,5v if any of our axes will lose steps, we should increase the voltage by turning the screw on the driver. While mesuring be careful not to touch other pins on the driver and accidentally short a circuit.

At the end, we screw printer back. If we decided to replace fan in the power supply, we will have to cut bottom cover.

If we have succeeded, we should quickly see and hear the difference.
Here’s how printer works before and after modifications:
Let us note, however, that I did not have access to a professional sonometer and the results can only be considered as illustrative.
Theoretically, new drivers should also be more accurate. However, if it is so it seems to me that in this respect the difference in print is not great. Here is a photo of the same print. On the left is the printout made after modification on the right before.

With such printer work for many people now even multi-day printouts or printouts at night should not disturb us and our neighbors.
However, if it is too little for us, we can build encapsulation for printer. Personally, I used 5 plexi plates with dimensions of 50 × 50 cm for this. glued with a special for plexiglass glue „artcofix” (https://sklep-artcop.eu/kleje/529-klej-artcofix-20-ml.html) and for a nice look I have improved the edges with insulating tape. Do not forget about ventilation. Personally, I used an inexpensive silentium fan and two prints:
https://www.thingiverse.com/thing:1078849
In plexiglass openings can be made using a normal drill and hole saw, even for wood, use only low turnover and do not hurry. For temperature control (which should not exceed 40 ° C) I installed an inexpensive thermometer. The whole is presented as follows:

With this case the printer can hardly be heard. Aditionaly Plexiglas protects the machine against dust and other dirt. It can also come in handy if you decide to print in ABS.
Below I will also add .stl files to the used prints if for some reason original links would not work anymore.
“which should not exceed 40 ° C” – how have you concluded this???
It is based on printer user manual which states that printers ambient operating temperature should be between 8° C – 40° C.
dzieki za tutorial! super sprawa
gdzie kupiles plexi i jakiej grubosci?
Ciesze się ze tutorial Ci się podobał. Jeśli chodzi o Plexi kupowałem je za pośrednictwem allegro. Rozmiar to 50×50 cm o grubości 2mm. Wydaje mi się że to mogła być oferta tego sprzedawcy: https://allegro.pl/oferta/plexi-plexa-50-50-2mm-bezbarwna-pleksi-plyta-8038272126
Thanks for the good description! Did you print out the extrauder chasing in PLA? I did not yet touch it. Does it not get quite hot?
Yes, it was printed in PLA. I don’t use it now, but as I can recall it was not getting hot (why should it? I thinks it’s quite much distance between heater block and chasing)
At what voltage are the fans running? 5V or 12 V?
Im to printing atm and I want to order new fans now
If I remember correctly those were 12v fans.